
TL-CAM
The Ultimate Drop-In-And-Go ESP32-CAM microSD Remote Control Time-Lapse Photo Server.
What?..
It annoyed me that there wasn't a fully-featured, or even meagrely-featured open source time-lapse SD cam server for ESP32, so the usual happened (I rolled up my sleeves) and here it is..
This sketch transforms your ESP32 (probably ESP32-CAM) into a camera server appliance that will take photos at predetermined intervals and save those photos to a microSD card. Operation is brain-dead simple* from any internet connected device with a modern web browser.
When your ESP32-CAM grows up, this is what it wants to be.
Why?..
It's difficult to overstate the importance of affordable, usable, functional time-lapse camera facilities. Especially in this fast-changing world of ours. I feel it's our duty to record these changes. So much is being lost.
In this time of major transition we current humans perhaps have a responsibility to record the changes we see around us, for those who come after. Maybe first we need to look. Whole swathes of our planet are being irreparably altered, as well as fruitfully repaired, and for under a tenner (plus an 18650 battery or two you probably already have lying around) you can add to the science.
Or whatever you want. TL-CAM doesn't care one way or the other, aiming to be only a superb time-lapse camera server. A tool.
* Or, if you prefer, you can plug-in mind-bogglingly complex. TL-CAM aims to serve!
Enter the Server..
TL-CAM is an actual server, accessible over WiFi, where you can view saved images as a clickable file list or thumbnails. It has a nice Web 2.0+ interface so you can "do stuff", like pop-up previews (especially useful for pages with lots of small thumbnails - also works in list view - just hover), delete saved images and even mess with your camera settings or view a cute live stream video preview. Also works with touch-screen devices.
Web stuff all happens with AJAX, so it's fast. You can adjust images-per-page, thumbnail width, toggle previews, or even just take snaps, right from the main page. And much more.
You can also plug in a serial connexion (probably over USB) and send commands, as well as get gobs of information, if that's your bag. Commands can be sent over the web, using the controls in the cute pop-up preferences panel, or via the web-based serial console controller page, which enables you to send all your usual serial commands over the web, for when a serial connexion isn't possible, or if you just prefer a web interface. TL-CAM aims to be flexible like that.
TL-CAM works out-of-the-box with all the common generic sensors (e.g. OV2640, OV3660, OV5640, etc.).
Download TL-CAM
To use (four steps):
Edit your preferences. Please take your time.
There are quite a few things which can be set and you will get a better experience by spending a few minutes there, understanding what is actually going on.
If you enable remote control (YES!), be sure to edit your WiFi credentials++.
Upload your sketch.
Place your ESP32-Cam somewhere (with an SD card inserted).
Supply power.
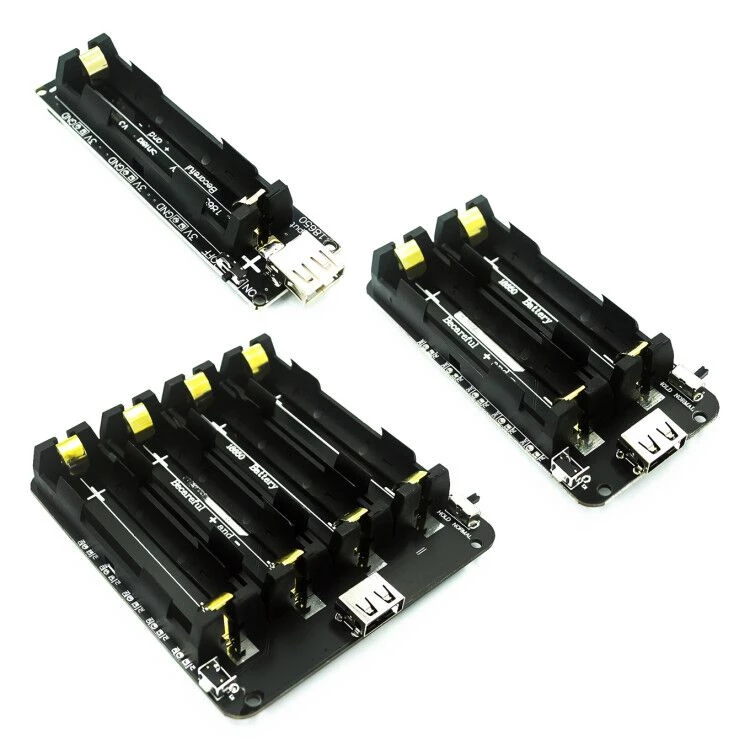
Perhaps from a well-charged 18650 battery shield - I love these things..
You could attach a suitable solar panel to the charging side and leave your £5 ESP32-powered TL-CAM in-place, with secure remote WiFi access (TL-CAM also creates its own WiFi Access Point), for ever. Ahh... ***
*** TL-CAM features an auto-sleep mode designed especially for portable battery use. Simply put; when it isn't taking pictures it sleeps, saving energy.
Built to Serve..
TL-CAM will boot-up, optionally connect to and/or create a WiFi network and optionally set its time from an internet time server (so you get real file timestamps and optionally timestamped file names), setup a web server, then start taking pictures.
Point your web browser at it and a list of saved images will appear, paginated to your specifications. You can click on any link to view the image. You can also choose to view your images as thumbnails.
The server is designed to be highly effective for quickly setting up a shot or checking if the results are what you expected, without needing to..
power off > remove the SD card > shove it in a PC > mount > check the images in some program > dismount the SD Card > put it back into the ESP32-CAM > reboot the ESP32 device > :repeat: etc..**
Or whatever. The ESP32 has the power to handle all this server stuff on top of taking pictures, if only someone could be bothered to code it up and maybe even release it for free. *cough*
** But if that's your bag, TL-CAM also has commands which enable you to safely eject and re-insert your SD card on-the-fly. No reboot required. Also available from the web view's prefs panel.
The web server will generate a listing of 20 image links (or thumbnails) at a time. You can set the minimum images-per-page in your preferences as well as the current amount on-the-fly, up to 200 images-per-page, from the drop-down at the top. There are simple buttons to take you home, backwards and forwards (pagination), toggle thumbnails, etc..
The pagination buttons simply pass an HTTP GET "start" parameter and the number to start at, e.g..
http://espcam/?start=100
.. which would begin the listing at image 100**. And so on
The wee "x" in the upper right of each thumbnail is the delete button. There is no warning dialog, so don't click it unless you actually want the image completely and utterly gone. For clarity, your cursor switches to a crosshair and the entire thumbnail box dims and turns red (except on Firefox - real soon now! (it's okay, we have a fall-back)) when you are hovering over a delete button (one of dozens of such "touches").
Other touches:
- Intelligent auto-numbering and time-server failure fall-back.
- Automatically reducing the size of textual output as thumbnail size decreases, right down to 50px.
- Automatically disables pop-up previews if the thumbnail size is bigger than the preview size.
- Fully-configurable drop-downs for thumbnail size and images-per-page.
- Auto-preloading images in list view when PoP-Up Previews enabled.
Along with (optional) animated loading icon. - World's First Radio-Button-Drop-Downs. Possibly.
- Streaming SlideShow facility (with background commands).
- Intuitive, multi-use HotKeys.
- Smart pop-up titles with dynamic, useful information.
- Live, auto-vanishing AJAX messages and background notification pulses for user actions and significant events.
- Intelligent zoom-on-click with finger AND mouse drag repositioning for zoomed real-size live stream.
- One-click light and dark mode (with individual settings for each web client stored in a browser Cookie).
As well as Automatic Dark Mode; switches with your local night time. - HotKey slideshow and preferences operation.
- Semi-Intelligent user-friendly output for things like times, file sizes and much more.
- Automatic sensor-detection and auto-ranging.
- Dynamic on-event web-to-serial-to-web communications for live interface updates.
- Auto-Advance on delete in thumbnail or list view. You can click-click-click with zero hand motion.
- Auto reboot or page refresh when setting applicable prefs with reload directly back into prefs panel.
- ALL interface states seamlessly restored on page reload/refresh.
- Viewport-aware pop-up preview with auto-space-sensing overlays and automatic, dynamic "gallery" mode.
- I'm just stringing pseudo-random words together now. But, all true. And much, much MUCH more..
Built-in Help at every level..
Hit F1 or H from the main web interface to get instant help with all the HotKeys. Click outside the box or repeat the HotKey to get back to the main interface.
Hover your pointer over any control for details about how it works.
For hackers, all code is fully documented right where it matters - in the code. As well as oodles of tips, tricks and hacks for those brave adventurers with proper text editors.
WiFi access and web server
Get a list of saved images in your favourite web browser. You can view your saved images right there; with pagination, Home and other useful buttons. TL-CAM can operate in station + AP or AP only mode, creating its own access point so you can have web control even when their are no local WiFi networks. TL-CAM creates its own WiFi network; a trivial task for any ESP32 device.
IT'S A DAMNED SERVER ALREADY!
The best stuff is hidden away.
TL-CAM; as well as providing its own, super-groovy web interface; also provides a number of APIs for you to create your own interfaces. Basically, you can set any parameter of your camera server, and much more, via web request.
The official ESP32-CAM examples; while not actually doing much; do provide a fairly complete set of controls for our sensor. You can bet this is by design. I wondered; wouldn't it be marvelous to be able to just drop-in these pre-made pages and have them actually do something with our live TL-CAM server. In other words; why reinvent the wheel?
So, as well as a plethora of built-in features and TL-CAM-specific commands, TL-CAM supports the complete Espressif camera API right out-of-the-box.
“You wanna get nuts?
Let’s get nuts.”
Upload and Serve..
What would be the use of being able to use funky custom controllers if you couldn't get them into your ESP32's web server IMMEDIATELY, or at least, with one click (two if you count the click where you select the file you want IMMEDIATELY uploaded)? A rock-solid upload facility is a must. TL-CAM has this.
Send POST data to /upload or see the ever-wonderful prefs panel for a cute button.
Crucially, TL-CAM will also happily serve any file you happen to upload. As so completes the cycle +++.
From a developmental point of view, this means you can go tweak > upload > refresh and you are back in the result. When creating controllers for your cam, this is potentially HOURS of saved time. No need to recompile your sketch. TL-CAM is waiting with a web API for everything.
TL-CAM's built-in interface can handle all your basic needs; viewing and deleting saved images, thumbnails, in-page slideshow, live view and so on. If you need more; plug in the required controller.
I decoded the HTML of the official webcam examples, cleaned them up, removed the extraneous bits, added some TL-CAM goodies, and you can find them sitting alongside TL-CAM.ino, ready for you to upload and control your own device. One click and you enter a whole new world (or rather, a familiar world) of control.
All the good stuff is there; image settings, pll, window control, gamma, SDE, CMX, live stream preview (that stays put!), get and set registers and so on. Or code-up your own. It's all just regular HTML (with JavaScript and CSS, of course, to do the magic).
If the beefed-up sensor-specific example controller pages aren't enough, there's also a neat indexing slideshow facility, enabling you to access your images directly by their numerical index (the second of TL-CAM's slideshow facilities). I coded this up in under an hour; including tweaks; it's easy, so you have nothing to stop you creating wonderful ways to access your time-lapse / live-cam / spy-cam / whatever-you-call your ESP32 camera server, in whatever ways you need.
Hopefully I've covered most usage scenarios in the the examples and no more than minor edits will get you where you need to be. If not, let me know.
Ho! The beloved /console from SignalGenerator has returned, as a "plug-in" controller for TL-CAM, so you can send all your serial commands over the web. More info below.
NOTE: Uploading a file overwrites any existing files of that name; no confirmation; so you can *tweak*, upload, test, *tweak*, upload.. and so on, without any pesky dialogs or default actions getting in the way of your flow. Which is to say, it's a single-click type deal.
Thumbnail view
And a button to switch back-and-forth. As well as viewing, you can use this interface to delete individual images. This happens with AJAX and is fast. If real time is enabled, your thumbnails also have visible timestamps (these are overlaid with CSS).
You can go all the way down to 50px thumbs; the thumbnail information displays dynamically reconfigure to fit your current view.
The thumbnail view has been "optimised" for a 1366x768 display, which is to say, you can put 20 thumbnails per row, and have three rows (60 thumbs) and still have enough space to flip TL-CAM into gallery mode (with a fixed previews centered in the empty space)*. Of course you can run TL-CAM on much smaller and much larger displays, but that's what I use for my laptops and main entertainment screen****. Available thumbnail sizes go from tiny to massive.
* Or you can have 160 small (50px) thumbnails in one screen, ready for slideshow mode-with-no-scroll-bars. Or else Ctrl-Click the title for full-screen mode. TL-CAM aims to be flexible.
If you want to display things even differently, all the id's and classes are ready for you to edit.
SlideShow
This malarkey is 100% browser code, JavaScript, and neatly iterates the DOM to presents an overlaid, window-sized preview of all the current images on the page, with big forward and backwards buttons at each side (which slip underneath if you resize to just the image - another touch, and fade out of view if you stop moving you mouse / stylus - another touch).
As well as the big buttons, the slideshow accepts arrow keys and swipes, so you can quickly zip around your (previously cached) images with zero strain on your ESP32 module. "Delete" or <BackSpace> to delete an image, "s" or click / tap the image to save it to your browsing device.
Click/Tap the main info title at the top to activate the slideshow. Hit <Enter> or click/tap anywhere outside the slide to exit.
Ctrl+Click/Tap the main info title to go full-screen. This method is preferred over F11 et al, as you will return neatly to your regular window when you exit the slideshow.
The current image file name is displayed at the top-left. When your slideshow viewing loops around either end of the current batch, this file name and the dark slideshow background pulse gently, as indicator. If you delete an image, there is a brief red indicator pulse to let you know the operation was successful (triggered by the server response*). Also play/stop, and so on.
SlideShow also works in List View mode, if you have PoP-Up Previews enabled (as the images have been cached).
Which is to say, if you DO NOT want images loading in your browser AT ALL, DO NOT enable PoP-Up previews!
Shift-Click any thumbnail/link to begin a slideshow at that image. Ctrl+Shift+Click to do the same, but full-screen.
SPACEBAR to toggle auto-play, in whatever direction you were previously travelling.
On touch devices, two-finger swipe left or right to toggle auto-playing the slideshow in that direction.
TIP: when performing a two-finger swipe, it's best to have your two fingers touching each other, to prevent the device attempting any zoom action.
Use the arrow keys / swipe to change the direction or advance (and reset the timer).
NOTE: The slideshow auto-play begins after the slideshow time, to give you a moment to sit back.
Hit the SPACEBAR when slideshow isn't open to immediately open a slideshow in auto-play mode. Add the Ctrl key to go full-screen (e.g. Ctrl+SPACEBAR).
Whatever you do, don't hit "f" (or three-finger drag the slide) whilst a slideshow is playing, or you will toggle Fast As F**k Mode, which utterly ignores your carefully-chosen slideshow time and just pumps images at you, 250 milliseconds apart. Up and Down Arrow keys can tame this insanity, or make it worse, whatever. Have fun.
Note: the first run through the images in Fast As F**k Mode mode might be a bit jittery, but thereafter (once the images are in your RAM) you will fly through them seamlessly.
There is yet another slideshow facility which works independently of any page size and memory restrictions, using a highly novel approach, enabling you to watch ALL your images in a slideshow, even tens of thousands of images. See here for more details.
Live Stream Preview
There is a live stream motion-jpeg preview facility, mainly intended to help your setup your shots, it's quite fun in its own right. You can get to it from the play button on the main page, directly via URL with your browser, VLC, etc., as well via the 'L' hotkey from anywhere in TL-CAM's main web page.
Rather neatly, you can still process all your usual commands, captures, web interface, everything, while the live stream is running. If required, frames will be dropped from the live stream, being the lowest priority process.
The stream initially loads in auto-fit mode, filling one dimension of your browser viewport, regardless of its actual size. Click/Tap the stream to switch to actual-size. Click/Tap again to return to auto-fit mode.
View and/or record your live stream with VLC or other similarly-equipped program, at /mjpeg or /stream
Start and stop recording the stream at any time; from the web interface by hitting the record button or ' (apostrophe) key. A red dot will pulse to let you know recording is in progress; either in the bottom-right of the live stream view or, if it's not showing, the mina window.
From either console you can do:
record
to start recording the stream and..
stop
to stop recording. Simple. If extended information is enabled, your serial console will update you every 100 frames captured, regardless of how the recording was initiated.
If you load/refresh the web interface after starting a stream recording from the console, the recording indicator will be pulsing. Also the record button will be a stop button, which you can use to stop the recording at any time.
NOTE: While the stream is running, you can always hit '.' (dot/point/full stop) or the capture button to capture an image at any time. As usual, TL-CAM will switch to the capture resolution (if it differs from the stream resolution), capture and switch back.
Pointer Paradise!
I should take a minute to explain the other pointer features available with live stream view..
By default, the live stream opens in "fit" view, using up as much available space as possible and scaled to fit. As mentioned, clicking/tapping the stream toggles between 'fit' and 'actual-size' modes. Now it gets interesting..
If your stream is larger than the viewport, click any area to zoom-in to that exact area. From there, you can click-and-drag the image around to quickly get to any area of the live stream. Works with pointer or finger. Pointer motion is accelerated so you can rapidly move around the image. You should; if you click/tap in the centre with the default acceleration; be able to reach every corner of even a 5MP image with a single drag.
If your live stream is smaller than your viewport, you can click-and-drag the stream around your viewport. When you do this, the tastefully semi-transparent dark background vanishes and you can carry on working as before, except with a wee live stream preview running in the bottom corner, or wherever. Yes; adjust preferences, play a slideshow, take snaps, whatever; the live stream carries on. This was a bugger to code so be sure to use it a lot!
You can even drag the thing off the edge of your viewport and it a) will happily sit there, and b) won't even pop up a scroll bar in your browser. You can also rotate the tiny stream (hit 'R' to rotate the stream 90 degrees clockwise), as well as drag it around in its rotated state.
Sadly there is no way to detect live changes to the size of the contents of an <img> tag, but if you happen to switch frame size in the serial console or by direct URL method while the stream is running, clicking the stream twice will get you back where you were, except with automatically adjusted dimensions.***
As always, check the comments around the relevant functions for more tips and tricks.
Serial command-line interface
Connect (probably via USB) and you can change settings on-the-fly. Send "help" or "?" for a full list of commands.
Web Console
/console is back as a TL-CAM custom controller page..
TL-CAM provides loads of back-end functionality. For a start, the entire serial console command-set is exposed to the web.
Upload the ready-made Console.html file to your TL-CAM (the upload button is in the prefs panel) and then point your web browser to..
/Console.html
(or whatever you named it - the extension is optional; you could name it simply 'c', if you like, or perhaps 'console'. It will still work as expected)
Now you can send any command you might send over a serial connexion, except over the web. The output from your commands will be fetched with AJAX and displayed beneath the command input.
This facility even handles confirmations for wipe commands. Quite nifty and most useful, particularly when serial access is difficult or impossible.
New browsers (and senders of empty commands) with thoughtfully receive a list of all the current commands, for reference.
If it isn't obvious, TL-CAM's ability to receive commands directly over HTTP means you can code up your own controls for anything you like, using any HTTP-capable tool; wget, cURL, etc..
Preferences storage
Our Snap Time Interval Settings are saved to NVS (Non Volatile Storage) so you can connect, change the interval, and from then on, whenever the device powers-up it uses your newly-specified interval. Most settings are stored in NVS for power-up-and-go goodness; e.g. LED brightness, image quality; stuff that you want set before you take your cam+battery shield out into the wild.
Oh yes, you can set the LED Flash brightness. We are using proper PWM to power that crazy-bright (3030) SMD. Turns out, when set low (1-2), it's highly useful as an indicator.
Enable extended information to see all the saved settings at boot-up. Send the 'nvs' command to see all the currently-saved settings.
Web Preferences, aka. "Prefs Panel"
You can get directly to important camera settings directly from the web interface, via a cute pop-up overlay; LED brightness and such, adjust web settings like image caching and slideshow time. You can even eject and re-start your SD Card, as well as get information about memory and your SD card's remaining space. You can set the snap interval time, too, with cute radio-button-drop-downs.
All settings take effect immediately.
Most changes will simply notify you of the change. If you change a visual preference (dark mode, spacing, etc.), the page will automatically refresh and automatically re-open the preferences panel, which should happen very quickly, so you can continue without interruption whilst of course enjoying the new setting.
If your change requires a reboot, the page will poll your ESP32 device and report back as soon as the reboot is complete and the web server is ready for use, usually a few seconds later.
Click the cog icon for all the goodies.
NOTE: You can also hit ',' (comma) to open the prefs panel.
Pop-Up Previews
There is a Pop-Up Preview facility, where you can see your images (at half the viewport height, by default - this adjusts dynamically) when you hover your mouse over any thumbnail / link. This has proven to be *very* useful. This facility can be toggled in the web interface (or with the 'p' HotKey).
Although designed primarily for desktop browser use, I have coded in touch features for tablets and phones; swipe left and right on the PoP-Up Preview image to move backwards and forwards (with cute JavaScript animation), for example.
As there is no way (yet) to detect a stylus/finger hover from a touch device, you can instead swipe a thumbnail in any direction to bring up the PoP-Up Preview. Two-finger tap on a thumbnail also works.
Having said that, my Samsung Galaxy Tab, with the regular pen can do all the hover functions just fine (I've tested with Kiwi and Chrome Browsers), sometimes. Then it stops. I'm guessing YMMV. It's not a problem; there's a fall-back mechanism for everything so you're good to go with whatever device.
PoP does proper AI, not like that Chat-GPT nonsense; adjusting the position of the pop-up to match your mouse and viewport size. Never fails. Ever. (insert deadpan stare). It also smartly disables itself if your thumbnail size is larger that it is. That's intelligent.
NOTE: If you have PoP-Up Previews enabled in list view, TL-CAM will pre-load all the images on the page (in the background) so you hopefully shouldn't need to keep your mouse / pointer hovering over the link for any time to load the pop-up. A few seconds (depending on the size and number of image links in your list) after the page finishes loading, all the images should be in your cache, ready for instant preview. If I'm close enough, I can actually hear my AI Thinker Cam working with the SD card.
In fact, I found this information useful and missed it when physically distant from the cam, so I made an optional rotating icon that does the near-same thing.
NOTE: You need a decent screen size (at least 800px wide) to properly utilise pop-up previews, though it will work right down to the smallest screen.
On touch devices we use a slightly altered logic as a) there is no "hover" and b) you don't want to be sitting hovering over a thumbnail for seconds or minutes at a time (you can take you hand off a mouse). SO..
Instead, you can simply swipe on a thumbnail in any direction (straight down would be a mistake though, as that would refresh the page) to pop up the preview, which will stay there, until you pop up another.
If you like, this 'sticky' behaviour can also be enabled for regular desktop use; see the prefs panel.
NOTE: When PoP-Up Preview is disabled, as well as skipping image loading/caching, we skip loading all the PoP-Up Preview code (JavaScript). This makes for leaner listings (and less HTML transmitted) if you prefer that.
However, if the page loads with PoP-Up Preview disabled and you then enable PoP-Up Preview, the page will need to re-load. Once the PoP-Up Preview code is loaded in your browser, you can toggle the PoP-Up Preview endlessly without reloading the page.
Gallery Mode
When you have PoP-Up Previews enabled, and the available space in your viewport is big enough, TL-CAM switches to "Gallery Mode" which is so smart it told me to shut up and just let you play with it.
A similar thing happens in list view mode; when there is space on the right, TL-CAM utilises it to the max. It's so smart, next you'll be asking TL-CAM for great pasta recipes, but TL-CAM knows nothing of pasta, preferring instead to focus on being a superb time-lapse camera server.
Capture-on-demand
You can do this from the web view, too. Comes in two flavours. . (dot) captures without resetting your capture timer. ! (exclamation point) captures and resets your timer. There is also a button in the web interface (a big asterisk '*').
You can also grab a capture at any time by sending an HTTP request (i.e. by pointing a web browser or cURL/WGET/etc.) to /capture
Your most recent capture can always be had at /recent
Real Time functionality
Save actual creation times based on time information supplied by an internet time (NTP) server. These timestamps are also reported in your serial and web listings.
Time is updated automatically.
You can also use time/date stamps in your file names. Fully configurable, of course.
About Time..
TL-CAM has a workman-like approach to time-keeping. If you have access to an NTP server, we use that. If not, TL-CAM can fall-back to using the stored times, which will have either been manually set by you:
time <UTC>
or else supplied by the most recent contact with a time server.
At shutdown, TL-CAM stores the current UTC to be picked up again at boot-up.
You can setup your cam where there is internet access and deploy where there isn't, yet still have accurate-ish timestamps.
You could even run TL-CAM somewhere one time with internet, reboot (command: x) and then compile TL-CAM with zero remote code enabled (comment out the compiler definition) and deploy with only stored time; no internet access required and yet still with functional timestamps.
Space Estimation
Estimated remaining SD capacity is reported to the console (in MB as well as "number of remaining images"), along with other useful stuff.
The more images on the card, the more accurate this estimate will be. If there are no images on the card, the estimate is based on an "average" image (which is based on your chosen image capture size).
TL-CAM has been through a few re-writes in the space-estimation arena.
For a long while we kept a running tally of all file sizes, added bytes when you captured an image, removed bytes when you deleted, and crucially, opened all files at boot-up to calculate total bytes and what-not to estimate remaining image space and so on. Now we do none of that.
ESP32 File System access, as I may have mentioned, is SLOW. Whenever you do the standard openNextFile(), your ESP32 scans the entire directory from the beginning, for every single file, taking exponentially longer with each file. It's a stupid bug in the source that no one at Espressif seems to want to fix, for some reason. So we skip all that and use getNextFileName(), which is fast as f*ck. You can zip through the list of files in a fraction of the time.
Sure, we can't extract useful stuff like timestamps and file sizes but for most actual operations, this isn't required. Similarly, instead of keeping track of the total space we simply query the SD filesystem for the current amount of bytes used (removing the size of any wear-levelling files we may have added) and divide that by the number of image files found.
Utilising the fast functions (e.g. SD_MMC.usedBytes()) along with our quick file count, we can estimate the average size much more quickly.
I'm not kidding around here. I switch over right now to my nearest TL-CAM and do a 'ql' (quick list) command.
866 files. Iterated in 0.22 seconds.
Next I do a 'list' command, forcing TL-CAM to gather ALL the details (in other words, force the standard openNextFile() behaviour). ... upbeat Jazzy (Haha! Sorry Gilles!) elevator music ... Pom pom pom tada dada.. *yawn* ...
110.62 seconds
That's almost two entire minutes. Waiting.
I look on the web and I see so many 'examples' using the openNextFile() method to iterate files for no good reason. It's disheartening, and will not scale.
During web listings/thumbs, TL-CAM uses the fast method right up until the files we want to display, and then (optionally) switches to the slow method to extract useful file information, for only those files. The best of both worlds, you could say.
SD Card Control
Eject / Insert functions enabling you to remove and re-insert an SD card without the need to reboot your module. Image acquisition will now safely pause, instead of crap-out.
You can do this from the web prefs panel or any console.
NOTE: If you attempt to perform any SD-related command while the SD card is ejected, TL-CAM will chastise you, in no uncertain terms, for your foolish behaviour. Which is to say, TL-CAM is fairly fool-proof.
SD Card benchmark
This is useful for discovering the maximum rate your ESP32 module can pass data to and from the SD card, and thereby figuring out how quickly you can take pictures; if speed of image acquisition is required; or load thumbnails/images.
Wear-Levelling
Directories on the SD Card are ignored. This enables you to do manual wear-levelling, if required.
For example; if you regularly take 100 shots then delete them, then repeat, that area of the card will wear out more quickly than the rest, which is a waste of a card, as it will quickly become unusable while 99% of of the card is perfect.
So, if your shots are 200kB-ish each, you could (with your card emptied) create a directory in the root of your card and drop a 21MB or larger file into it (using up all the space your looping 100 images were previously using).
New files will now be saved in a fresh area of the card. Every ten or twenty or so cycles, add another 21MB to your wear-levelling directory. When it gets full, empty it and start again. Your card will now last a long, long time.
All files inside all directories are considered to be wear-levelling files and their sizes will be incorporated into free-space calculations and space-remaining estimates**. In all other ways, directories are completely ignored.
Most SD cards are pretty dumb when it comes to file allocation*, but TL-CAM makes it easy to roll-your-own.
* If it matters to you, and you have the funds, SD Cards with automatic wear-levelling do exist.
**Unless there is a dot (.) in the directory's name; in which case it is completely ignored.
Presets
You can backup all your sensor settings by simply doing:
And restore those settings like so:backup
restore
TL-CAM appends the sensor name to the backup name so that you don't accidentally apply out-of-range settings from a restore operation. This also means when you switch sensors you can do:
restore
In a carefree way!
But TL-CAM goes further, enabling you to make backups with your own specified name, e.g..
backup SleepAnalysis
And restore the same way..
restore SleepAnalysis
You can see a list of all presets with this command:
presets
NOTE: If you specify a name for your preset backup, TL-CAM DOES NOT add the sensor name to the preset and assumes you know what you are doing.
Fast As F**k Mode
How capable is your system and browser? Got spare RAM?
In case you missed it, when a slideshow is playing, hit 'f' and you enter "Fast As F**k" mode. Now your regular slideshow timer is utterly ignored and images start bombarding you at, by default, 250 millisecond intervals. It is as insane as it sounds.
While in this crazy mode, you can use the UP and DOWN arrow keys to increase/decrease the timer, in 25 millisecond intervals, right down to 25 milliseconds, which is 40 frames per second; way higher than regular movies.
Yes, it's designed for previewing time-lapse / stop-motion sequences at playback or whatever speed.
And again, it's all happening in your browser. Your ESP32 is blissfully unaware of your bat-shit endeavours.
Sleep Mode
You can have TL-CAM enter a (Light or Deep) Sleep state between taking pictures. When running your TL-CAM from battery power, this saves a lot of juice. Batteries will last weeks and months instead of hours and days. The (approximate) numbers:
Normal: 80~260mALower end of the scale when idle, upper end when serving over HTTP.Light Sleep: 0.8mAThat's 1% of the very lowest 'normal' usage. Not bad!Deep Sleep: 10µA10 µA is approximately 0.0125% of 80 mA!
Or to put it the other way; 80 mA is 800,000% of 10 µA!
Big Heapum Maximum Power Save!
WiFi Remote Control features will be disabled (as WiFi itself is disabled). TL-CAM will wake up a second before the due snap time (three seconds in Deep Sleep Mode), capture the image, then go back to sleep; either straight away (light sleep) or after a short delay (deep sleep - see below).
You can wake-up TL-CAM manually by sending any character over the Serial connexion (Light Sleep only). This character will not be processed as a command. Once awake, if required you can re-start WiFi remote control features using this command:
web
And put your TL-CAM back to sleep manually with the command:
sleep
Toggle automatic sleeping with the command:
ts
In Deep Sleep Mode, there is a small delay after each picture is taken (and at boot-up), to briefly enable you to send commands. By default this is ten seconds. For example, you might want to toggle Deep Sleep Mode..
td
Streaming SlideShow
This works in much the same way as a video stream, except instead of pumping sensor frames to your browser, we pump saved images, at the specific interval you specified in your slideshow time setting. Using this facility, you can enjoy a slideshow of all your images, here..
http://espcam/slideshow
Replacing "espcam" with the local domain name (or if you must, IP address) of your own ESP32-CAM, of course.
This slideshow respects the time you set for your regular slideshow. While the Streaming SlideShow is running, you can override the playing device's current slideshow time from any prefs panel, from any browser (i.e. you could adjust your TV/big-screen TL-CAM slideshow time on-the-fly from your phone). The new time will be applied immediately. If you start a new streaming slideshow, it will use whatever time the playing device has set as its default.
You can send background commands to pause and resume the streaming slideshow, as well as skip forward by any number of frames (skip commands are processed immediately, so regardless of the time, 'skip100' will immediately take you forward 100 images). You can also pass the 'next' command, to immediately jump to the next image. Aside from that, it just runs. You won't even see the file name (if you have extended information enabled, this will be show in your console). Just fire it up and sit back.
You can start your streaming slideshow at any number by passing ?start=<number>, e.g..
http://espcam/slideshow?start=500
On a PC, you will probably want to go full-screen (F11) for this; not only because it's less distracting generally, but because you won't have to watch the continually loading tab icon. By "PC" I mean any desktop/laptop/server/pi/whatever system running a regular desktop web browser.
And yes, you can do all the other stuff while this is running, except run a live stream. In this respect, TL-CAM follows the standard MCU Ghostbusters Protocol; Never Cross The Streams.
Which is to say, only one streaming service will run at a time. If you have a streaming slideshow running and then fire up a streaming video preview, the slideshow will pause. And vice versa.
Indexing SlideShow
Hold on! You're having a laugh now! THREE SLIDESHOWS?
TL-CAM aims to be a flexible beast. To this end we have multiple ways to iterate the image files on your ESP32 device.
Firstly, there is a JavaScript SlideShow facility which, as mentioned, iterates the images on the page (with many features, such as Fast As F**k mode). Then there is the streaming slideshow, which goes NEXT, NEXT, NEXT until you shut it down. Thirdly, we have the indexed SlideShow..
This facility enables you to view any of the captured images by their index. Simple it may be, but with this facility, you can create your own slideshows.
In my browser I can just hit a button or HotKey to go to the "next" image in a sequence, which is to say, if I was currently viewing https://darnedcoolwebcam/000001.jpg, I could use a plug-in (aka. add-on) to parse my current location and take me to the next.
Similarly, I could trivially script the retrieval of images 150-340 by way of script, or whatever.
In other words, you could create a slideshow controller yourself (in HTML+JavaScrip / C / Bash / Python / whatever) and use it to produce a completely custom slideshow facility of your own design.
As we know, Tl-CAM will happily serve any files that exist on your SD card, including HTML files; so Boom! Custom SlideShow Controllers.
An example indexed slideshow controller is included. Simply copy to your SD card or better yet, use the..
Upload Facility
TL-CAM includes a file upload facility (inside the prefs panel). You can upload HTML SlideShow controllers and they will be immediately available in your web browser. Or any other file, for any reason.
Coupled with TL-CAMs ability to serve any file on your SD Card (as well as the multiple exposed web APIs), we have ourselves the ability to upload custom controller pages for immediate use.
NOTE: Uploading a file overwrites any existing files of that name.
NOTE: There is a command ('qla') which lists ALL the files on your SD card, even non-image files. Also available as a custom page on the web at /qla.
Touch Control
The TL-CAM web interface recognises "Touches" and so enables swipe actions for mobile devices; you can swipe left and right in slideshow mode to move forward and backwards between your images. There is a super-cool, yet simple JavaScript slide effect by way of feedback. This works so well I felt the need to tell you about it.
Swipe in any direction or two-finger tap on a thumbnail to open the PoP-Up Preview. This code relies on the beautiful imperfectness of human beings, and almost compensates for the lack of stylus hover capabilities in the "modern" web standards. (Though I swear, *sometimes* hover does work with my tablet stylus. It's random, impossible to reproduce reliably and certainly not intended. One day...)
On touch devices you can even swipe left and right on the pop-up preview and go forwards and backwards through your images, like a mini slideshow. TIP: Position your PoP first.
As mentioned, you can also swipe UP to exit a slideshow. This also means that if you have only a small number of thumbnails on your page, there will be no way to force a mobile browser to slide the viewport up to fill the screen, so you will be stuck with address/title bars and the bottom of the image cut off.
The solution is to load more thumbnails on your page (or make the thumbnail size bigger) and slide the page up before you begin your slideshow. You can also do it after the slideshow is open by swiping up-then-across.
Dark Mode
Set two background colors in your preferences and then switch any web browser between light and dark mode with a simple checkbox in your prefs. This affects all background elements; main page, borders, buttons, everything; and is lovely.
This setting is not stored in NVS, but instead in a client-side Cookie, so the setting is specific to each web client (browser). Same story for your slideshow time and many other browser-specific settings; so you can have different setups on different devices and browsers. And save space in your ESP32's NVS (there is LOADS of NVS space in the standard ESP32-CAM partition scheme, so this is a minor consideration).
Auto Dark Mode
Dark mode can also be set to automatic, so it enables and disables itself at predetermined times of the day. You can set when day and night begin, in your preferences.
I recommend you leave this as-is and forget about it. When night-time comes it will switch over and you will go "Ooooh!", or else go switch it manually right now and spoil your own fun.
This is the default setting, so you can just leave it alone, right. Goan. Try it. DO NOT check or un-check the dark mode checkbox. Let it happen automatically when the sun goes down. ...
Continuous State
What? Well, if you have the prefs panel open, or slideshow, maybe playing, or live stream running, maybe off in the bottom-right corner of your viewport, TL-CAM will remember these states, as well as status of PoP-Up previews, thumbnail/list view, thumbnail size, images-per-page and so on, when you refresh the page. Hit F5 (or your OS equivalent) and TL-CAM will put everything back exactly the way it was.
If you had a slideshow playing with 100 images and have now deleted half of them, refreshing the page brings up the next 50, auto-playing right from where you left off, except with all the new images loaded. Tasty!
It probably goes without saying that you can therefore bookmark this exact state, for future use.
How is this magic possible?
There are a few interesting ways to save data to your browser; working around the "stateless"* world of HTTP; the most simple being the "GET" parameter; which adds, ?some-variable=some-value onto the end of your browser's address bar, e.g. ?start=100.
* In other words, in HTTP (the protocol we all use to browse the web) the web server has no memory of your previous visit, even if it was only a moment ago; unless the page code makes this happen; usually with Cookies. For some things; like your slideshow time or DarkMode preference, this is ideal; you can come back in the future and don't have to tell the "stupid app" the way you like things to be.
Whenever the state of the interface changes; you open or close the prefs or slideshow, start or stop the slideshow or live stream playing and so on; we immediately update the address bar with the new state (using JavaScript).
If you hit F5, you get right back to the exact same state; except now with updated information.
There is another layer of settings living in Cookies, and yet another layer on the ESP32 device itself (continually updated to NVS); each of your individual settings being stored where it is most usefully belongs. For example, capture size could be usefully set from a browser but it makes no sense to store this setting in the browser.
Conversely, it makes no sense to waste space in the ESP32's NVS recording, for example, your Thumbnail width. Same goes for many other settings; things specific to specific device and browser combinations. It is not only wasteful but more importantly; limiting.
Not one byte of TL-CAM exists without careful thought. And we have carefully thought and decided that your ESP32-CAM doesn't need to care about your current DarkMode setting or whether you like small or big thumbnails in this particular browser, or whatever.
But TL-CAM completely recognises that you definitely do care about these things and kneels in the church of your desire with its back ready for your firmly-placed heel!
And More..
There are loads of things undocumented here - check out the many, many comments in and around the various settings and functions inside the sketch for more specific information, tips and tricks. Inline documentation is my thing.
Use, abuse and customise to your needs. Apache License.
As in my previous ESP32 offering (SignalGenerator), MCU coders will find oodles of thoughtful, creative, well-documented code you can pick up and use for your own IoT adventures; simple ways to do "modern" stuff, like responsive web interfaces, keyboard, touch and swipe controls, AJAX responses, web Cookies, dynamic CSS, theme-switching, user prefs storage and so on and so on.
When it comes to IoT devices, there is a minimum level of functionality I'm willing to accept. This is it.
Zen Master say, to achieve balance, one must cultivate both the back-end and front-end parts of the mind. Only then can true enlightenment be achieved. Also it makes your shit not-shit.
You may have spotted; my background aim is to pass along some of my decades of web-building experience to MCU coders in the hope that they might; with a few well-documented templates and examples; feel enabled to roll their own web-enabled creations, maybe even share them. I'm no expert; but I do know how to make stuff that works. And being a mercurially forgetful type, I document extensively, in case I need to come back at some later time. My pain is your gain.
Modern JavaScript (v6) is feature-packed and a lot of fun to code. Once your ESP32 spits out the page, your browser is doing all the work; the odd AJAX request is nothing to your ESP32. Bottom line: if you are thinking, "I wonder if you could do this?", you most definitely can. It's simply a question of having the code. I hope you find something useful here.
See below for details about the origins and above for the (loads and loads of) changes.
En-joy!
(c) me & the boys @ corz.org 2023
ps. I notice these lines are missing from the AI Thinker Cam section of Arduino's boards.txt ..
esp32cam.menu.UploadSpeed.1152000=1152000
	esp32cam.menu.UploadSpeed.1152000.upload.speed=1152000
esp32cam.menu.UploadSpeed.921600=921600
	esp32cam.menu.UploadSpeed.921600.upload.speed=921600
Unless you enjoy slow uploads, I recommend you add these lines to its UploadSpeed section. Boom!
Hundreds of perfectly functional uploads say the second of these faster speeds will work just fine (I'm using a ch340*-based dedicated ESP32-CAM motherboard, but I've also tested this with a few regular USB-to- UART adapters (CH340* and CP2* variants) in a breadboard, with 100% perfect results. I use Slackware, which may be a factor). 1152000 is temperamental on my boards but if you have a more modern UART chip, why not give it a whirl?
FYI, according to Arduino IDE, for me this sketch uploads in 10.4 seconds.
NOTE: I've been serving up HTML since last century, on everything from x286 laptops with no screen, to the latest-greatest VPS, and I have to say I've been mightily impressed by the basic web server facility that comes with the ESP32, as well as the ESP32's capacity to run it. I have pushed them to their absolute limits and loved it.
Having said that, we're dealing with a micro-controller, taking pictures, whilst writing data to an SD Card whilst also serving up fairly complex, dynamically-generated web pages, and maybe even simultaneously a live stream. Don't expect to be taking 5MP snaps every two seconds and *also* get snappy listings of new thumbnails. Your ESP32 module will perform all these jobs surprisingly well; just not at the same time.
But having said that, if you do exactly what I have just advised against; it'll work fine; only more slowly.
pps. Spaces between braces!
Keyboard Shortcuts (HotKeys)
Main HotKeys
[ Previous Page.
] Next Page.
, Preferences Panel (that's a comma).
T Toggle Thumbnails / List View.
P Toggle Pop-Up Preview.
SPACE Open and Play SlideShow.
L Toggle Live Stream View*.
' Start / Stop recording Live Stream (that's an apostrophe).
R Rotate Live Stream**.
. Capture image immediately (full-stop, aka. 'point').
F1 This help.
SlideShow HotKeys
UP / LEFT Arrows Previous Slide.
DOWN / RIGHT Arrows Next Slide (up and down functions can be reversed in your prefs).
S Save current image to browser device.
SPACE Start / Stop playing slideshow.
Enter Exit SlideShow.
F Fast As F**k Mode.
UP / DOWN Arrows During Fast As F**k Mode, these increase/decrease the delay (by 25ms).
* Small streams (smaller than your viewport) can be dragged around the viewport and left wherever you like. Their position will be remembered. Streams larger than the viewport will fill the viewport (in fill mode) and instead you can drag the image around (click tap the area you want to zoom-in to).
** Clockwise by 90 degrees, all the way round. Streams are still draggable in their rotated state. If you dig Math, check that shit out!
Current Console Commands:
    s/m/h/d(int)  Set new snap interval time**, in seconds/minutes/hours/days, e.g. s10

    list          SLOWLY list all image files, with dates and sizes, recalculate space, etc. (web: /list)
    ql            Quick list of all image files (no sizes or dates)  (web: /ql)
    qla           Quick list of all files (including non-image files)
    l             List all image files in whatever mode you are currently in. (web: /l)
    tq            Toggle Quick Listing mode

                  NOTE: The 'list' command is SLOW when there are a lot of images

    !             Capture an image and reset the timer to NOW
    .             Capture an image and DO NOT reset the timer

    record        Start recording MJPEG Stream (will overwrite any previous recording)
    stop          Stop recording MJPEG Stream

    i[*]          Print out information. With no suffix: current snap interval time
                  [a/d/e/o/a/q/r/s/t/z/etc..] information about various current settings, e.g. 'it'
    prefs         Print out all current i* settings (also see: 'nvs' command, below)
    t/time        Print out the local time / current system time (RTC)
    time *        Set system time to *, which is a UNIX UTC time, e.g.: time 1679897227

    c             Camera Sensor API**:
                  Use 'c param=value' to set any sensor value **, e.g.
                  'c xclk=12' (to set clock frequency) or 'c framesize=5' (set streaming frame size)
    size (int)    Set Image Capture frame size. (2MP:0-13, 3MP:0-17, 5MP:0-21) **

    backup        Save all camera sensor settings to the backup slot
    restore       Restore camera sensor settings from the backup slot
    backup *      Save all camera sensor settings to user-specified preset named *
    restore *     Restore camera sensor settings from user-specified preset named *
    presets       List all currently saved backup presets

    b(int)        Set LED Flash Brightness (0-255) (LED will flash momentarily at the new brightness). **

    free          Print out Free Space and images-remaining estimate
    eject / ej    Stop SD Card, so it can be ejected safely
    insert / sd   Re-Start SD Card after being ejected
    test          Run benchmarks on current SD Card (this takes a few seconds)

    e             Toggle Extended Information in the console. **
    dd            Display details in web listings (date and size) **
    to            Toggle Overwrite Mode (for numeric sequences, not timestamped file names). **
    tt            Toggle Timestamp File Names (see above setting). **
    ta            Toggle Auto-Snap (aka. Time-Lapse Capture - la raison d'etre!). **
    ts            Toggle Auto-Sleep Mode. **
    td            Toggle Deep/Light Sleep. **
    sleep         Put TL-CAM to Sleep immediately
    tr            Toggle Remote Control Features. **
    web           Start WiFi Remote Control Features after sleeping/stopping

    sp            Pause / Resume the Streaming SlideShow. (web: /sp)
    skip *        Skip * number of images in the Streaming SlideShow. (web: /skip?skip=10 OR /skip10

    erase         Delete all the image files from the SD Card
    wipe[*-[#]]   Delete image files [starting at file * [ ending at file #]]. e.g.

                    wipe 89-     (wipe all image files from 89 onwards)
                    wipe 89-95   (wipe all image files from 89 to 95, inclusive)

                  NOTE: Wiping from index * deletes files in the (l) list order. NAMES ARE IGNORED
                        Non-Image files also ignored. You will be asked to confirm this command

    delete *      Delete specific file named *     e.g.: delete test.html
    rename * #    Rename file * to #    e.g.: rename Console.html console

    uptime        Print out ESP32 module uptime
    memory        Print out current memory information
    x / reboot    Cleanly (i.e. store time, settings, flush buffers, etc.) shutdown and reboot ESP32 device

    sensor        Print out sensor settings (web: /sensor)
    sensorx       Print out extended sensor settings with main register info (web: /sensorx)
    nvs           Print out NVS-stored main settings (web: /nvs)
    nvsl          Reload and print out NVS-stored settings (web: /nvs)

    reset         Reset all NVS-saved settings back to (hard-coded) defaults and reboot
    nvswipe       Completely Wipe Entire NVRAM and reboot. (you will be asked to confirm)

    help          Print out this list of commands

    NOTE: Settings marked ** are stored in NVS and recalled after a reboot
Changes:
Initially based on the standard example, as well as the code from:
Marcio Teixeira (https://github.com/marciot/esp32-hacks)
SD Card access bits based on code swiped from here.
And a nice explanation of the camera settings:
https://heyrick.eu/blog/index.php?diary=20210418
The rest by me and the boys (@ corz.org).
Which is to say; fool-proofing, error-checking, AI, UI and Oh Aye! Features, features, features. Did I mention it's stuffed with dynamite features? Let's go caps and say FEATURES. Still not cutting it. Read the comments, instead.
v 1.0
First official release.
All dem goodies up there!
Full 'official' API support:
TL-CAM provides and exposes the complete ESP32 camera API to the web; like the official examples. In fact, you can drop pages from the official example right into your SD card and use them to control TL-CAM.
Better yet, I've provided updated and fixed versions of
OV2640.html,OV3660.htmlandOV5640.htmlthat you can upload and use directly; face recognition parts removed, TL-CAM-specific parts added.See the Controllers folder next to this sketch for these and other controllers you can upload and use with TL-CAM right out-of-the-box.
FAQs, Tricks and Tips:
The source code is the ultimate list of tricks and tips.
Here are a few others..Can't get internet time after uploading a fresh sketch?
Pull the power and try again. Now it works. It seems the reset performed at the end of an upload is not a full reset. Usually it will work fine, but a proper power-cycle is definitely recommended after a sketch upload.
footnotes:
* Debugging for the masses..
It must be noted that ALL the updated information you see in the web interface (notifications, pulses, thumbnail/link removal, and so on) happens only after an AJAX response has been received from the "server"; your ESP32 module.
While this does mean you may need to wait a couple hundred milliseconds for a prefs control to switch, or information title to appear, or thumbnail to vanish after deletion; or console command input to empty and so on; the major upside is that you are getting instant debug information right there in the interface.
If there was a failure or delay at the ESP32 side of things, you will immediately know about it, instead of continuing in ignorance.
In other words, there is a layer of user-friendly debugging built right into the UX.
This operational gestalt shift cannot be overstated - devs, pay attention and incorporate!
/consolehas two layers. Think about it.** Snails on Smack..
File access with the standard SD libraries is performed by lazy, overfed snails on bad opiates, or something. Or just bad code. There's a simple bug in the source code that no one seems to want to fix. When the truly open-source MCUs arrive, this sort of shit won't happen. At least, not for long. And this has been years. *sigh*.
SO, the usual method of
openNextFile() :repeat:is stupidly slow when you have thousands, even hundreds of files. However, it is possible to iterate file names rather quickly, so TL-CAM employs a hybrid method for its web listings.. Simply put; if you request?start=600&per-page=20, TL-CAM will iterate the first 599 images using the fast method and only then switch over to the full method, to grab all the juicy details. It's the only way, when you think about it, which I have.The upshot of all this cleverness is that instead of waiting over a minute (no, seriously) to even begin processing the requested file range, TL-CAM begins processing file details after around 0.2 seconds and your entire page should be with you in under two. The time savings of this approach get bigger the higher your start= number.
The two seconds is how long it takes to process the 20 images on display. If you have your pages set to 50 images per page, the page would be done in just under five seconds, regardless of where you start at. With the usual methods, we would be waiting roughly one second per ten images before we even begin processing, so if you had 10,000 images, you would need to wait almost SEVENTEEN MINUTES to display twenty images! TL-CAM's method returns that same page in seconds.
Even with only 1500 images you would be looking at SIX MINUTES to even begin processing data. With TL-CAM: 0.4 seconds. A decent improvement over the standard methods, I'd say!
*** The birth of web four-point-oh-fux-not-again..
Witness! With the advent of Web 2.0, instead of one layer, you had two layers. But Lo! TL-CAM brings you not one or two layers, but three and now; with this live preview thingie, FOUR layers! (and the help screen is five! OMG!) So that's Web 4.0, right there! You can tell your grandchildren, "I witnessed the birth of Web 4.0, and it was beautiful!".
You know, I think we could handle another layer yet … Maybe presets …
I am of course just kidding about at least some of that. But the holy trinity (HTML - JavaScript - CSS) is a magical thing, and having a device capable of dynamically spitting that (plain old stream of text) to a web browser is to have a magical device. Harnessing all this magical power however, is another thing entirely. Even the most excellent MCU coders seem to tragically trail off here. "Look mum, I made a button!" :/ .
You don't need some pay-per-month cloud service for this stuff. Your ESP32 device + some capable code can handle it all by itself. And with a lot less bloat. When running from Arduino IDE, you definitely don't want unnecessary external library code running for basic IoT functions.
**** Material Science..
An NEC commercial display I got locally for £40 and a song, a thing that has been kicked and soaked wet (took a few days to clear up, but crystal-clear-up it did!) and attacked with swords (wood and plastic, not real swords, ffs! I'm talking about KIDS here!) had games controllers thrown at it, been knocked clean over more than once, plants tipped-up on it and still soldiers on.
A screen that folk see and invariably go, "Wow! What a picture!" and it makes me laugh out loud because at home they have a "really kewl" consumer-grade "4K Display" that they bought at ten or twenty times my price because some reviewer said it was better than the other shit available in that consumer-shit bracket. Some people cannot be educated. Their brains are already mince. Och well.
It also has inputs for *everything* (so you can plug in all vintage consoles, oscilloscopes, whatever) as well as digital control, wall-screen facility and much, much more. One of my top three purchases, ever.
<tangent>
</tangent>For example, my sewing machine (okay, you got me, "machines", multiple) is (are, all of them*****) "really old". To some that means "eew". To others it means "a beautifully hand-crafted and finely-engineered machine from a time when such things cost as much as a car and served you a lifetime". One day, most likely, I will upgrade to a 1080p setup and I can assure you one thing: no matter how long I need to save up, and it won't be that long; see below; that upgrade will be a 2nd-hand NEC commercial display. I have learned.
It's like the 50's sewing machine of 21st century displays. In short, if you are going to have kids around for the next few years of your life, don't put some domestic-grade shit up on your wall; instead put a *beast* down nearer the floor where you can enjoy it, maybe on bean-bags, and most of all, okay two things:
a) Put it where it can become a device for total immersion - it needs to be in the right place for that - think ergonomics - when your 5 year old stands up to play Wii Sports, where is the top of the screen in relation to his/her eyes? (we're aiming for "level"), and..
b) don't be afraid to break it! Okay, mine was a crazy bargain, but even the price I see these things go for every week or two on eBay, is a crazy bargain. If the worst happens (and I challenge you to break one of these things under normal usage) you can just get another. Cheap.
Regardless of your material wealth, our planet really doesn't need to bleed all the raw materials and time and effort and the rest to create another shit TV that some consumer will bin in 13 months because either a) it breaks down (likely) or b) they upgrade to some other "great" TV because they are "unsatisfied" (again, likely, as your screen is actually shit).
Don't be a land-mass machine! Encourage quality manufacturing by buying stuff that lasts and can be passed on, passed down. It costs more, yes, and if you have the cash, I definitely recommend you support quality manufacturing directly, by buying new. A few years from now when you spot they added some feature you MUST have to their latest model, I love you and applaud you and will be right there to buy your old one at an amazing price! And it will *still* last for *ever**.
** Well, obviously, nothing lasts forever.
***** I have a particular fondness for vintage Necchi (my prize machine being an unusually beautiful Esperia; the Ferrari of sewing machines; a thing that can stitch through half a dozen layers of leather and is currently waiting for me to get around to finishing its motor refurbishment) and Elna (The Grasshopper is a thing of functional beauty - I have one for each of my kids for when they leave home and will definitely be finished all the refurbishments by the time that happens. Promise!). I also have an old Janome ("New Home") for when I need fancy stitches, which is rarely. Or when I am too intoxicated to thread a regular machine. And others.
If you are in the market for a sewing machine, I definitely recommend you go vintage, unless you need some fancy new digital tech for some reason (and there certainly are a few). For a new machine, anything under £500 is going to be a piece of shit that will break within the next five years under "normal" use.
For that same money, you could instead have the best sewing machine money can buy. Or even half that money. Simple fact; for many things, they just don't make them like they used to. I have machines that are happy to do heavy duties after 70 years of doing heavy duties.
You may know, Singer, the famous sewing machine company, were the first company to introduce "payment plans" for their products, because they were so darned expensive. Quality engineering by human beings costs money. There is no way around that.
Back in the day before corporate-subsidised slavery and planet-destroying disposable clothing, people made and repaired their own clothes, and dropping a QUARTER of your family's YEARLY income on a sewing machine was actually a good investment. You can pick up that exact same machine today for £100 - £200. WAY cheaper than any modern piece of shit in that price bracket, or even ten times that price bracket. It might need an oil and a clean, but under there is a workhorse, waiting to work.
When looked after, these old machines are still going strong 100 years later, even 150 or more years later. How many of your purchases, do you think, will still be going strong in 100 years? For sure, none of the plastic sewing machines built today will be around. Instead they will be dumped into the earth somewhere, polluting.
++ Oh them pesky data!
NOTE: Your ESP32 device will store these data in NVS, in plain text. If the ESP32-CAM module was physically accessed by someone nefarious, they could retrieve them. Just saying..
In other words, if you need to place TL-CAM somewhere where this might be an issue, it's best to disable remote features immediately and setup your TL-CAM over a serial connexion. Save the remote control* fun for after.
* All remote features can be completely disabled with a single preference. See above.
+++ Plug-In and GO!
When I started making TL-CAM, this whole idea was bubbling away under the surface of all my related thoughts; unformed; and almost everything I did was working towards it. One morning I awoke with the entirety of the thing in my head and took immediate notes. I realised I'd been comprehensively and steadfastly documenting directly towards a thing that didn't yet exist and I couldn't yet see, but could feel. And here it is. No re-writes required.